Configuring a SharePoint folder
Integrating a SharePoint storage space can have several benefits:
- Increase job storage space.
- Define storage spaces for RAG knowledge bases.
- Define storage spaces for skills.
- Define external folders for matching files.
HocNota prerequisites
Before configuring the folder, you must configure the Azure connection.
Configuring permissions in the Azure portal
Go to your organization's Azure portal (https://portal.azure.com/).
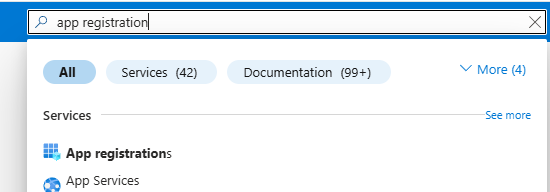
In the search bar, search for "app registration" to open the resource manager.
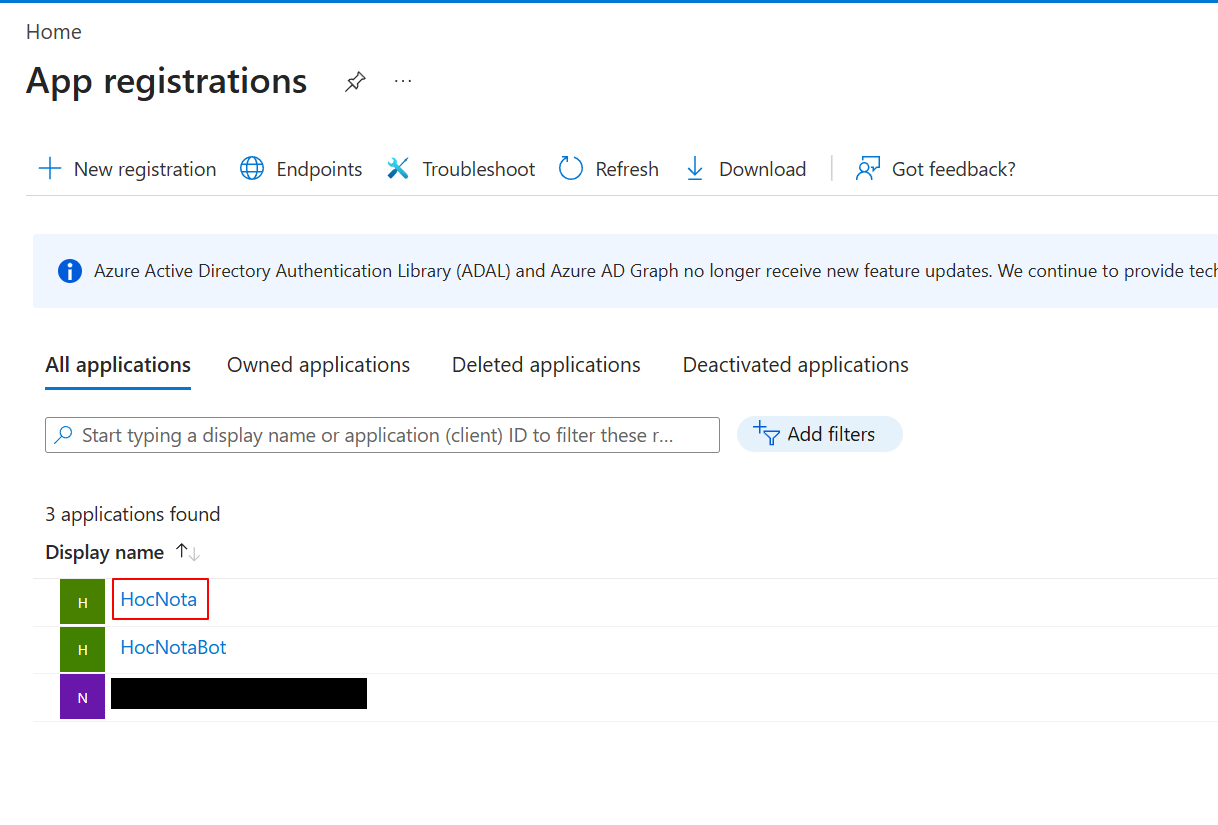
Select the HocNota application created during the Azure connection step.
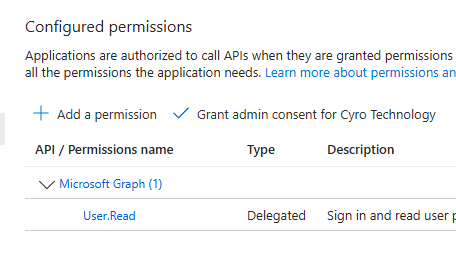
Select "API permissions" on the left.

Select "+ Add permission".
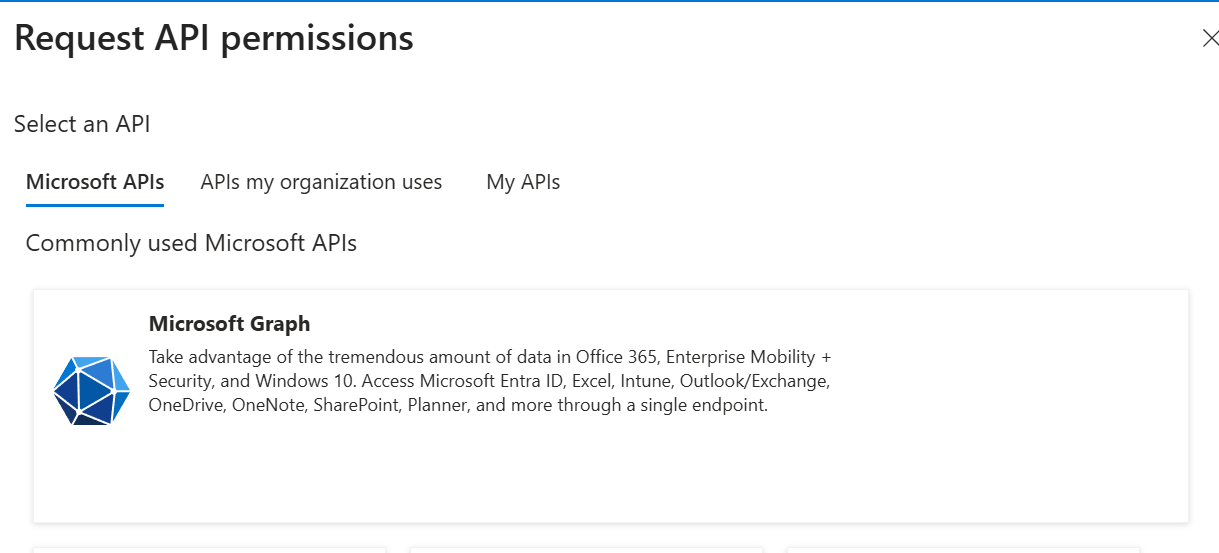
Select "Microsoft Graph".
Select "Application permissions".
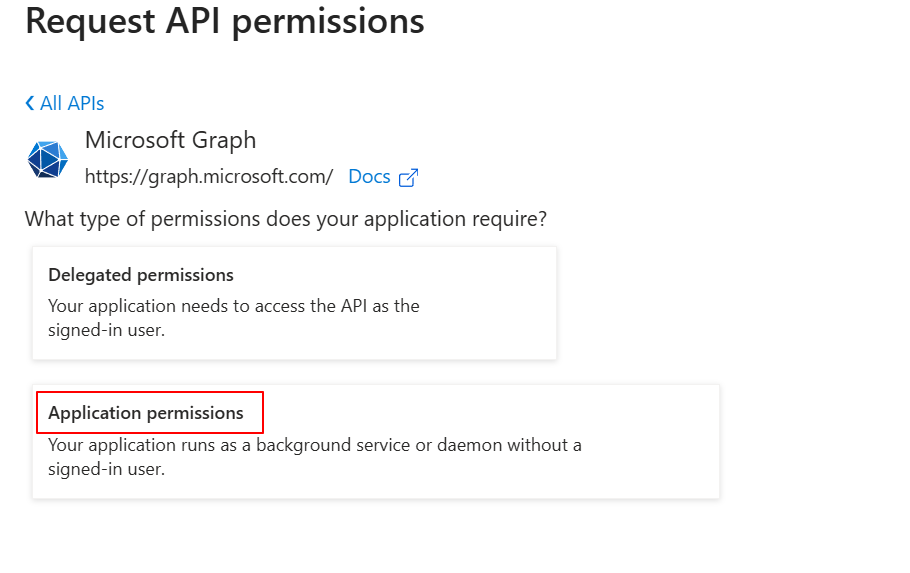
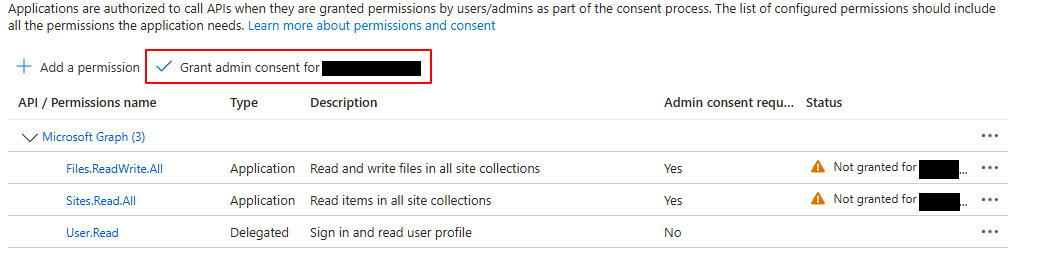
Select the desired permission level for Sites and Files.
To grant read/write access:
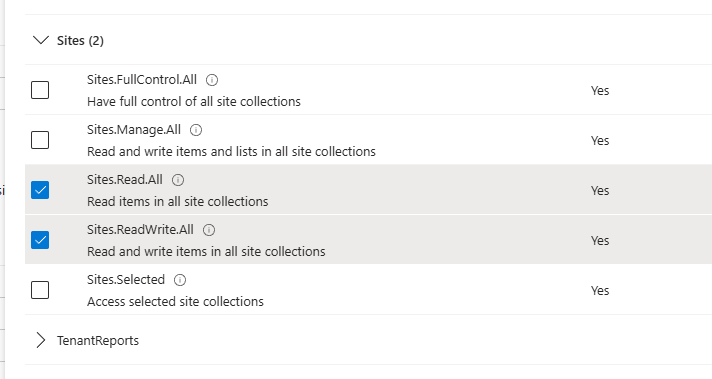
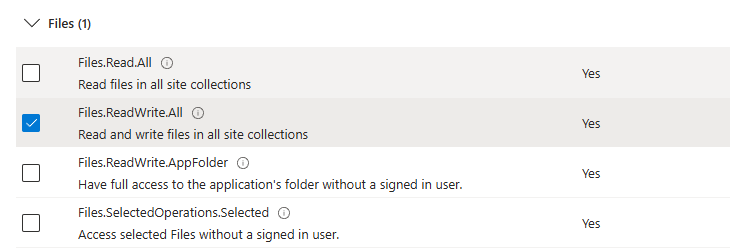
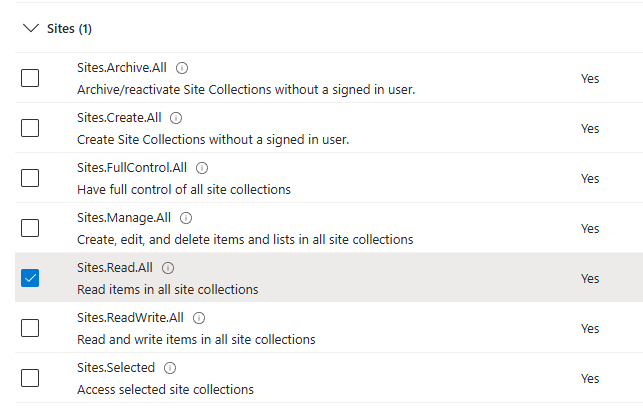
Click "Add permissions" once the rights have been added.
Then click "Grant admin consent for xxx" to apply the permissions.
Configuring the folder in HocNota
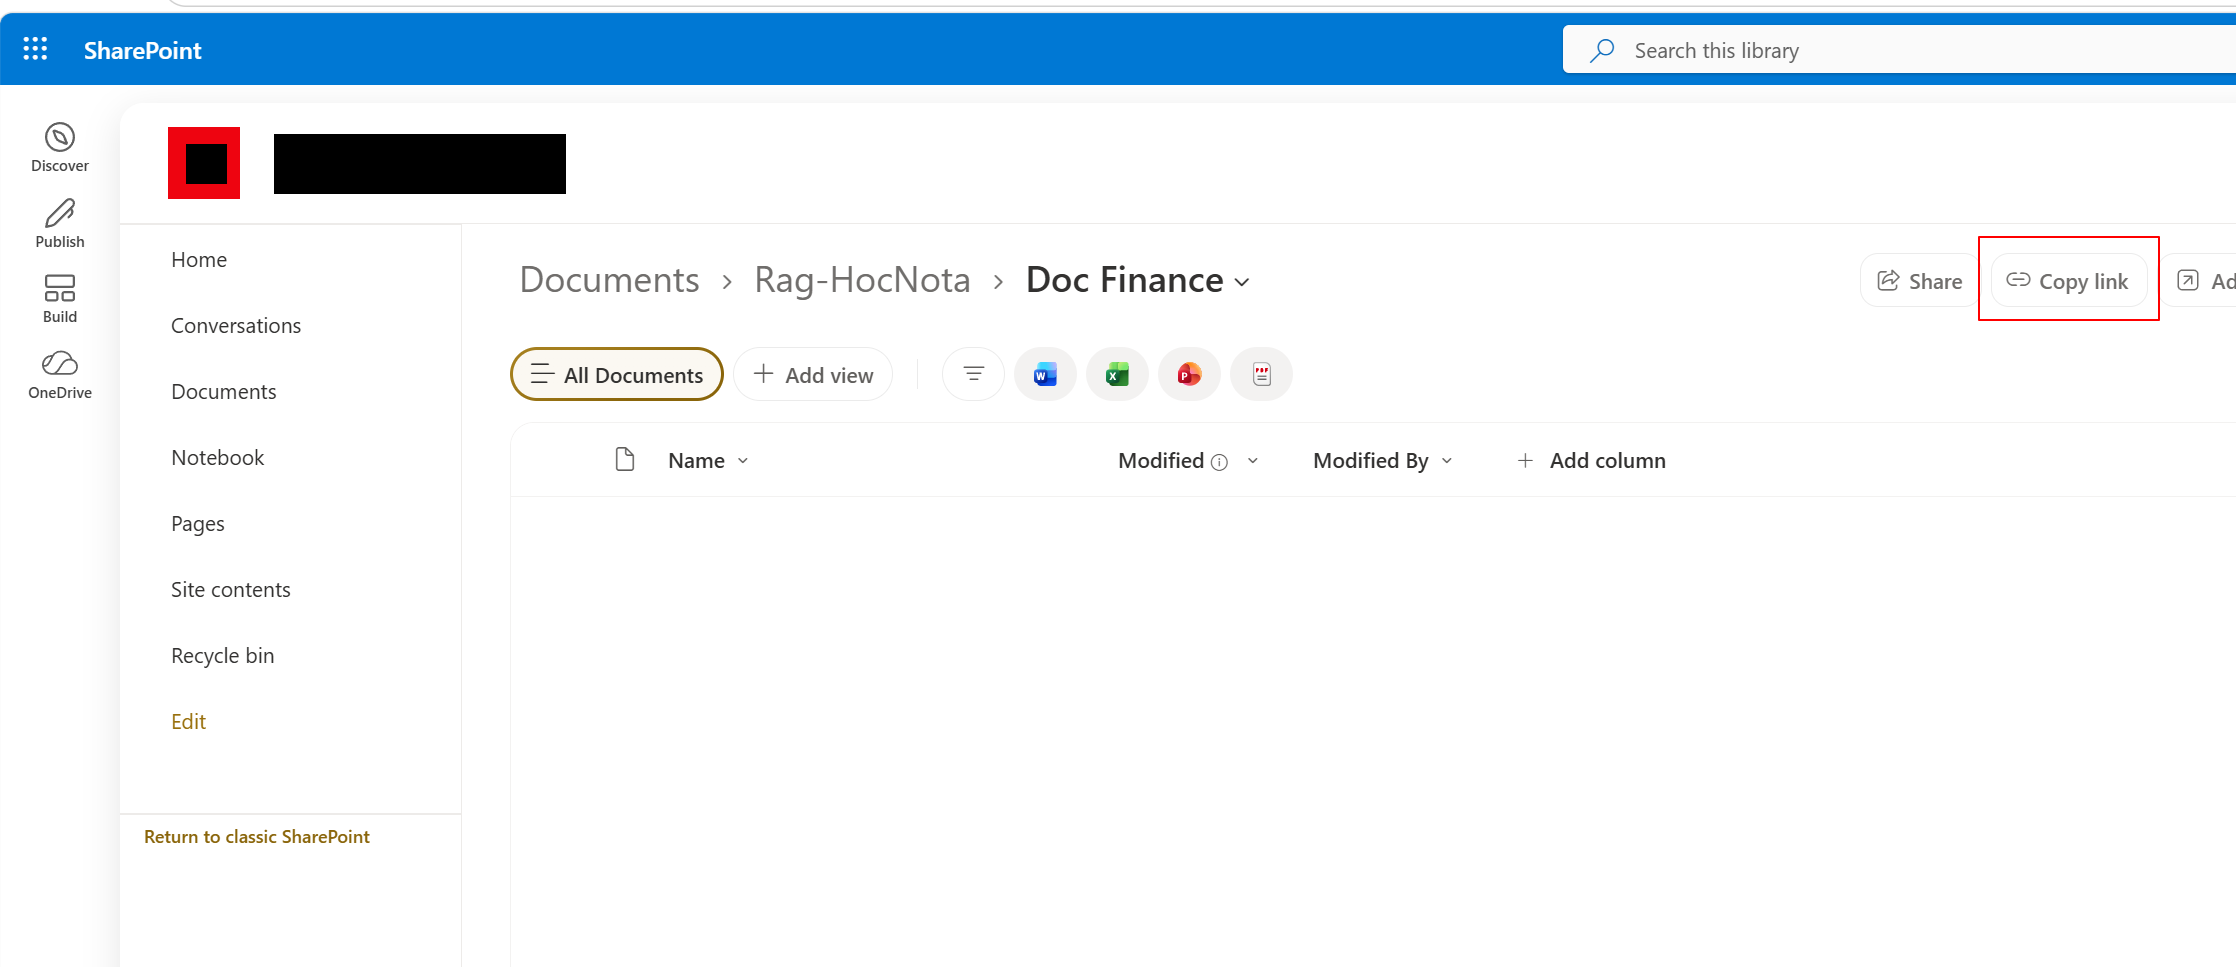
First, get the SharePoint folder link using the "Copy link" function.
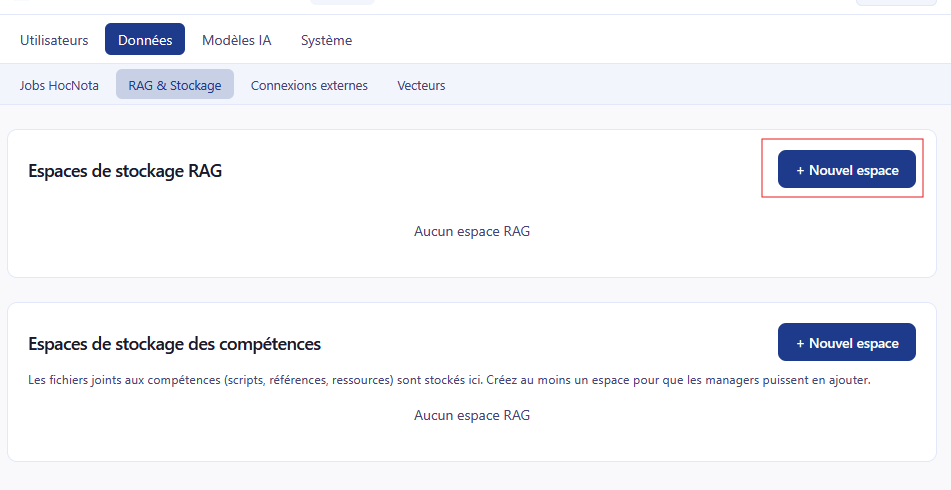
For this example, we will create a RAG storage space, but the principle is the same for other spaces.
Add a space.
Enter the folder information.
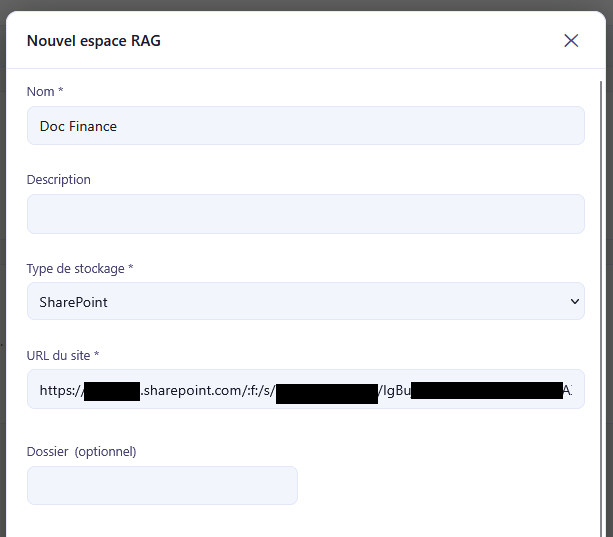
You can test the connection with the "Test connection" button.

Once the space is saved, it can be used from the Manager interface.
See also the reference page: Connecting HocNota as an Azure application.